Let’s talk about the feet, but first how did we get here?
When we began planning the Azadi Far Ride to the Murray 2024, we knew we needed some kind of hoof protection.
Our biggest concern was excessive wear and hoof puncture injuries. We weren’t keen on boots, they’re heavy, their spare parts are heavy and they’re time consuming having to apply and re-apply. Plus we didn’t want to have to contend with paranoia around rubs or losing them.
So we investigated other options like glue on shoes, which are okay, but prepping and sanding the feet is time consuming and then there’s the gluing. We did a trial and it went okay. But having to battle with Glory’s odd shaped feet and apply or reapply on the trek, we thought we could do better, so we kept researching.
Then we came across hoof casts, which solves the odd shaped hoof issue and part of the prep, but again the glue. That is until we came across a social media post where some were applying them without glue but screw anchors (Perfect Hoof Wear)! Perfect!
But would we get the wear out of them, we weren’t sure and Glory dishes with his fronts so then you have uneven wear on top. Some examples showed applying the screw anchors into the cast like wear plates. So we did a trial and we got a couple weeks.
Then we thought, if that’s been done…what about instead screwing on a polyurethane shoe?
And our genius idea was born!
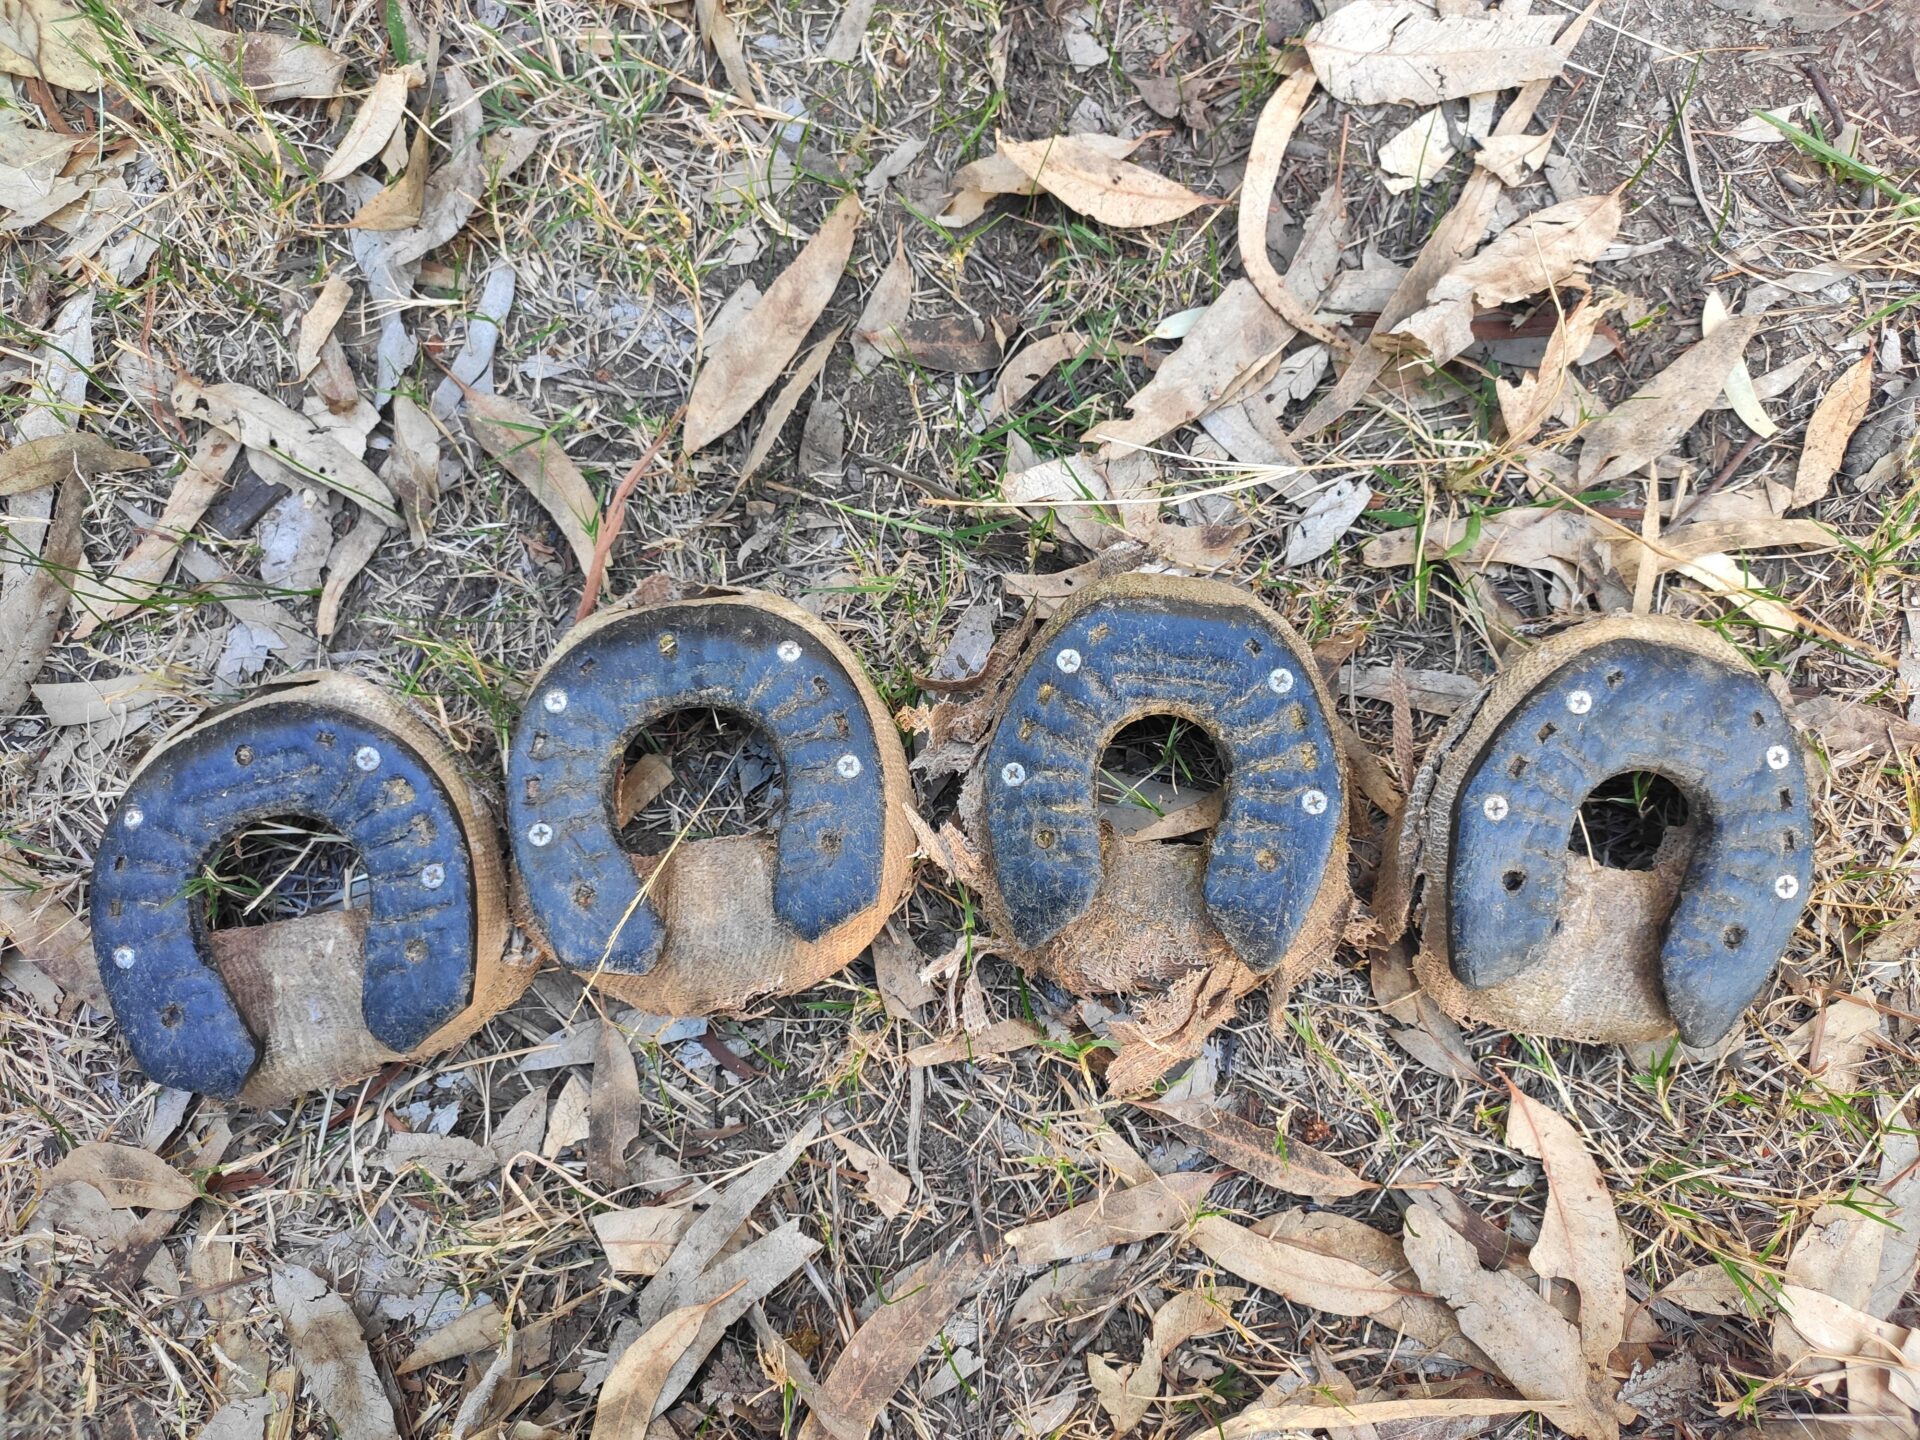
Over 1000km on two sets
What did we do?
Well firstly, we applied two different ways. For Melika, we attached screws to the Costin Horseshoes sides, taped them to the hoof with 3 pieces of duct tape and then cast wrap the shoes to the hoof using screw anchors.
This option lasted a week before Melika kicked them off in glee during a hoon. During this week though we went through black sticky mud and crossed creeks without issue. Investigation of the one remaining showed that the cast had worn through and lost connection to the screws on the horseshoe itself.
For Glory, we applied the cast to the hoof with screw anchors, then screwed the polyurethane Costin Horsehoes to the cast. We also re-applied Melika’s next set of shoes this way.
But how did it go?
It went fantastic! After 7 weeks and over 1000km, we have found the perfect hoof solution for us as we trek along the stock routes, and here’s why;
No messy glues
Quick and easy application (~5 minutes)
Fast re-application of new shoes (~2 minutes)
Shaped to the hoof
Lightweight (<200g – “an ounce off the hoof is equal to a pound off the back”)
Excellent performance in all conditions – mud, water, rocks, sand, grass and tar
Polyester cast tape is flexible like the hoof, supporting correct function
Perfect amount of slip and grip, like a bare hoof
Economical compared to glue ons and boots (~$30/hoof)
3 weeks old ~450km
For Glory, we never lost a single one! They lasted 4 weeks (~600km) before we re-applied a new set (due to uneven wear from his dishing with fores). I will mention that Glory did get some minor interference injuries on his fetlocks as the cast makes the hoof slightly wider and the cast is a bit abrasive. But after a couple weeks he adjusted his movement and didn’t get any re-occurrences. We navigated black mud, water crossings, rocks, sand, grass and tar faultlessly.
We had one hind shoe pulled by Melika (after 3 weeks), from her kicking and pawing her buckets and feed net. But it took only a couple minutes to re-apply before we were off again. Then she pulled a fore hoof cast with shoe, again from pawing at things and getting it caught (after 3 weeks). The benefit though, is that there is no damaged to the hoof when this happens.
Before we go into the “how” – Caution!
There are some key considerations when applying anything to a hoof, especially to a hoof cast. A thorough understanding of hoof biomechanics and dynamic hoof balance is required. Achieving balance around the axis of the hoof is central to its healthy function. The cast adds width and length to the foot, potentially making it difficult to identify correct placement. The shoe also adds additional height, again changing biomechanics and dynamic hoof balance. If you are not trained and experienced, you can do long-term harm by applying anything to the hoof incorrectly.
What did I use
Ozito Electric Screwdriver or Trojan Ratchet Screwdriver Set
3/8″ long countersunk head wood screws (anchors)
5/8″ long countersunk head wood screws (shoe screws)
Closed cell high density foam square 5cm thick x 20cm
Polyester cast tape 5cm x 3.6m
Small tub of water
Gloves (latex or vinyl)
Costin Horseshoes
Step 1.
Trim the hoof, including sole and frog. If you are worried about thrush a diluted iodine, sugardine or other thrush preventative could be applied.
Now is a good time to trim the shoes to fit and check where they need to be placed for dynamic balance and sound biomechanics.
Inserting screw into hoof quarter. Notice the damaged wall on Melikas hoof - there was no issue fitting this system!
Step 2.
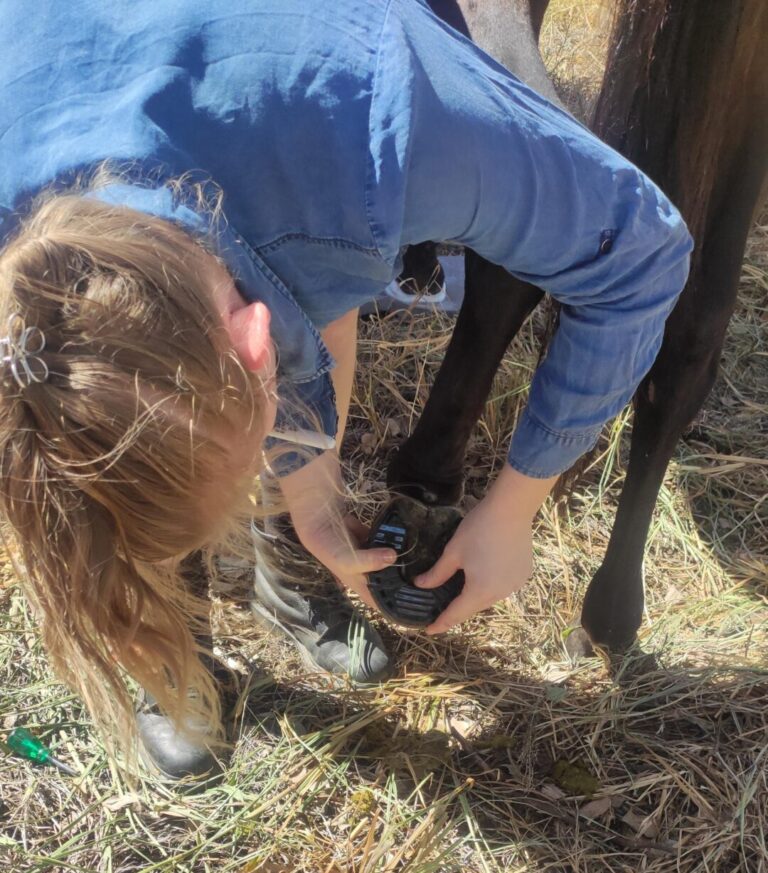
Install the 3/8″ screws halfway into the hoof wall about 3/8″ up from the ground edge, in 3 locations; both sides (where quarters meet heel) and the toe. We’ll attach a video link soon, otherwise Perfect Hoof Wear also has several videos on screw placement and wrapping.
The tiny shallow hole after removal
Step 3.
Now that you have inserted the three screws, put on the gloves and have your tub of water and foam pad within reach. Peel the foil wrap off the cast tape and put into the water for several seconds. Pick-up the hoof, squeeze the water out of the cast wrap, then hook and pierce the end over a screw to start. Do not pull it tight when you wrap. I start at one of the quarter screws, then go around the toe, to the other quarter screw then straight across the widest part of the frog (not around the heel) to hook over the other sides quarter screw.
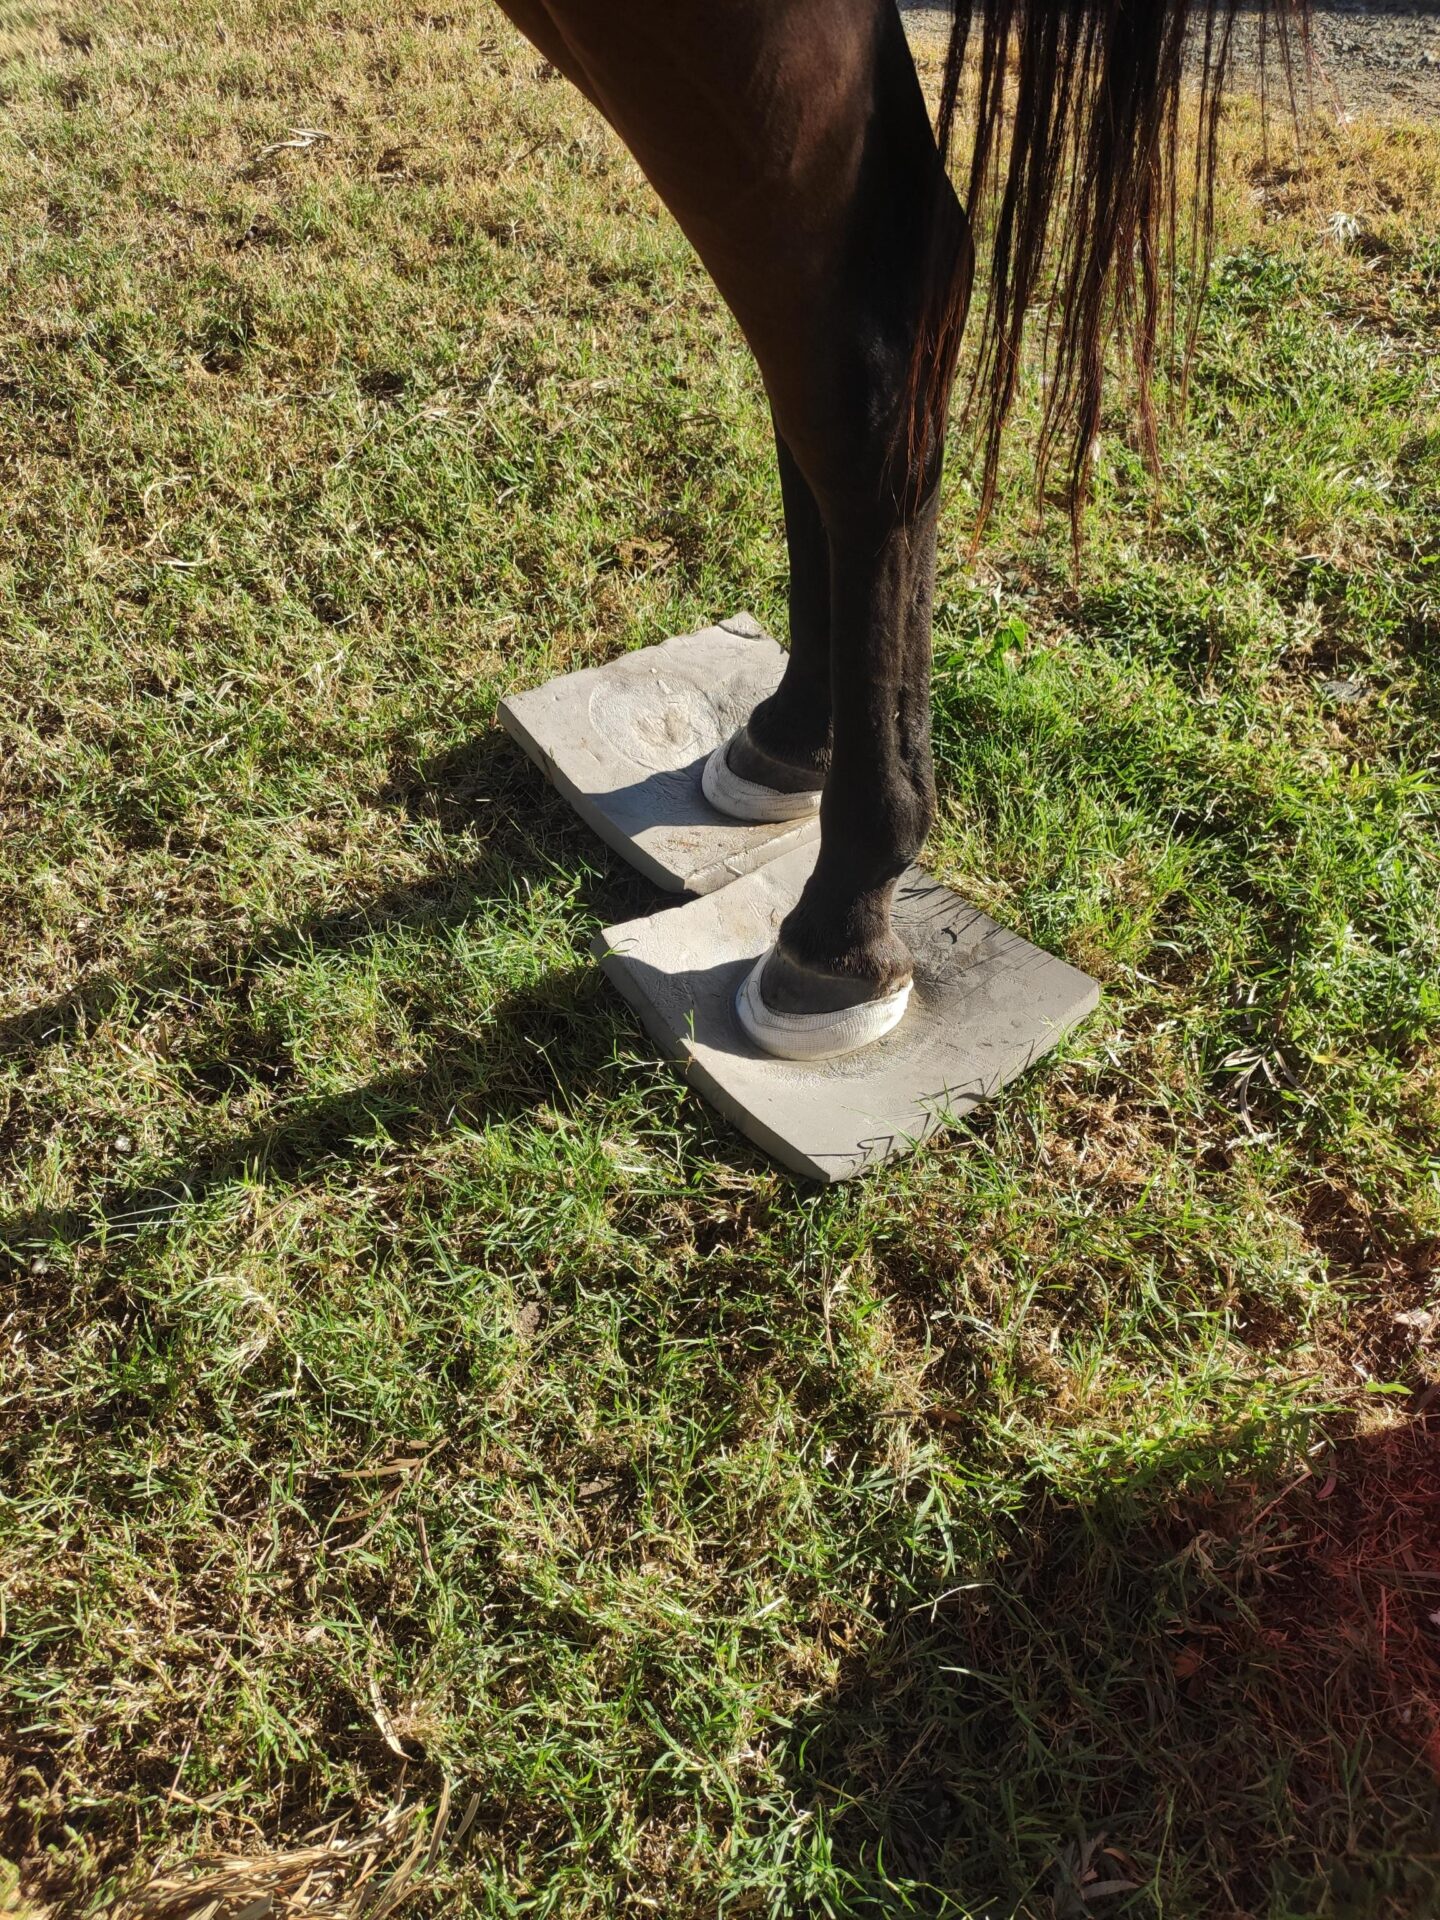
Continue wrapping around the edge of the hoof making sure you hook and pierce the wrap over the screw anchors in the hoof, until the wrap is done. Then using your thumb and palm, roll the wrap towards the centre of the hoof, off the wall and heel bulbs. Next lower the hoof on to the foam mat to allow it to form to the hoof before it sets. You can splash a bit of water onto it to accelerate the setting.
Give the cast a few minutes to set and form to the hoof before proceeding. I usually go to the next hoof for casting, so having two foam pads is handy.
Step 4.
Double check correct placement of shoe. Select the 5/8″ screws and using your electric screwdriver or ratchet screwdriver start one screw in the shoe so it is just protruding from the bottom of the shoe. Hold it over the hoof cast in correct place and attach it. Screw until you meet resistance and the shoe is flush with the cast surface. With the Costin Horseshoes the screw head was countersunk flush within the shoes nail hole. If you are using other shoes, you will need to check the screw length is compatible.
Only start with ONE screw in the shoe, otherwise you can’t use your other hand to hold the shoe firmly in the correct place. The order I use for the screws is; heel then opposite toe, then heel same side, then toe back on other side (in an X pattern). This helps prevent twisting or sliding of the shoe during install.
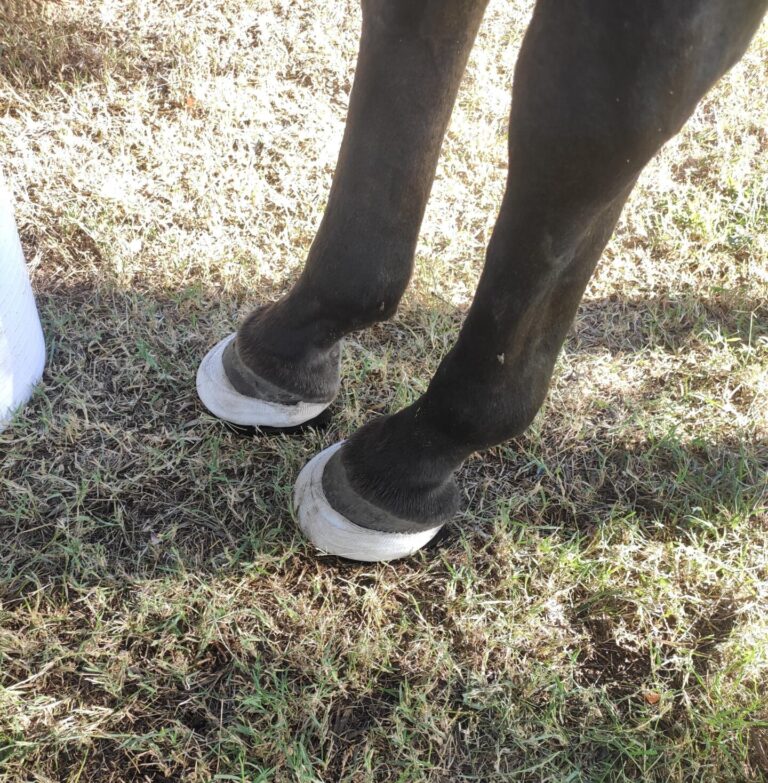
And VOILA – we’re done!
You might be thinking one shoe on Melika looks crooked, but she actually chipped off a large chunk of hoof quarter.
I did add a pair of extra screws to Glory’s shoes at the toes between week 3 and 4 because the heads were starting to wear through, but otherwise they required no maintenance. Nothing got caught or trapped in them and when I removed them there was no sign of thrush or hoof infection. I did try to pull the shoes at week 3 to install a new set, but they were stuck firm. Week 4 it was nigh impossible but I managed.
The cast stayed on Glory for 6 weeks and one cast went through two set’s of shoes (1000+km). The hooves still grow rapidly (especially on Glory) due to hoof movement and no abrasion wear, so I wouldn’t dare leave them on for longer.